24/4/11 자바스크립트 캔버스(canvas)
2024. 4. 11. 21:20ㆍ카테고리 없음
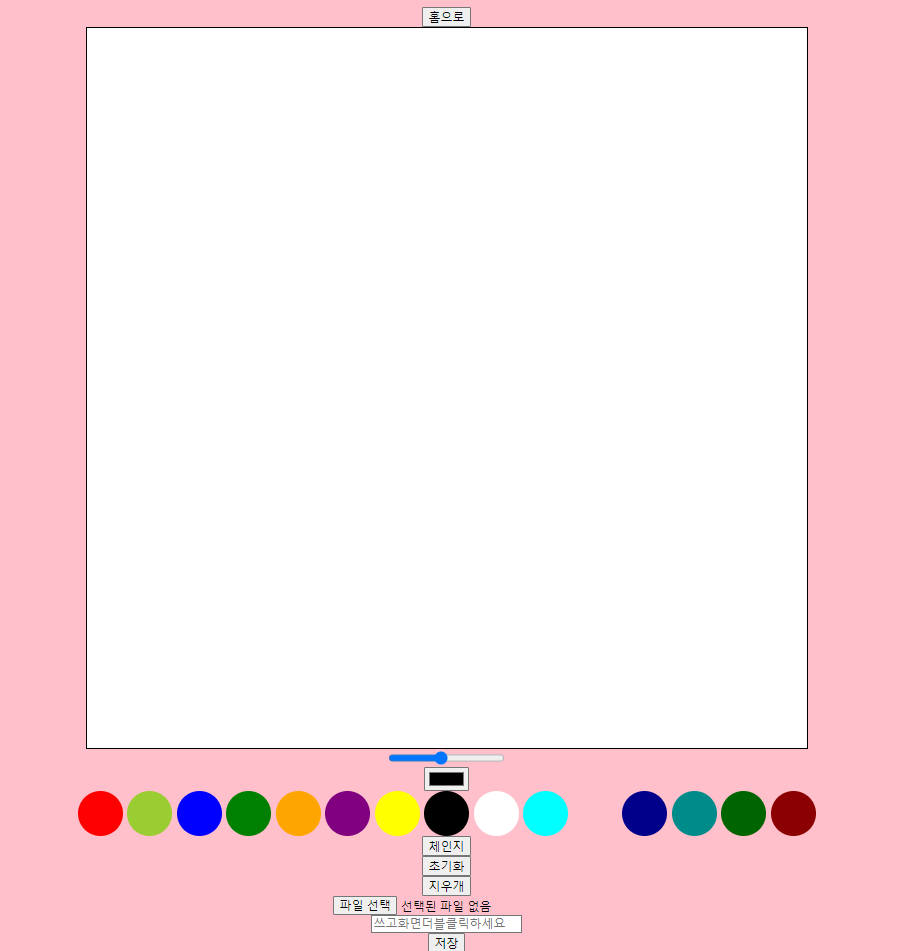
노마드 코더 클론코딩하면서 만들어본 그림판 렛츠 코드 복습
<paing.html>
<!DOCTYPE html>
<html lang="en">
<head>
<meta charset="UTF-8" />
<meta name="viewport" content="width=device-width, initial-scale=1.0" />
<link rel="stylesheet" href="./css/paint.css" />
<title>painter</title>
</head>
<body>
<button id="home">홈으로</button> //홈 page가 따로 있어서 거길로 가는 버튼임
<canvas></canvas> //그림이 그려질 캔버스 태그 요게 있어야 되쥬?
<input id="width" type="range" min="1" max="10" value="5" step="0.5" /> //인풋인데 타입이 range임
<input id="color" type="color" /> //이런 타입도 있다는게 신기함 type이 color임 오호
<section class="options"> //section은 그냥 색깔들 가로 정렬시키기 위한 부모태그
<div class="option" data-color="red" style="background-color: red"></div>
<div //여기가 동그라미 색깔들 태그인데
class="option" //신박한게 data- 이런 속성이 있음 얘가
data-color="yellowgreen" //아무 속성이나 만들어 낼수 있음 대박
style="background-color: yellowgreen"
></div>
<div
class="option"
data-color="blue"
style="background-color: blue"
></div>
<div
class="option"
data-color="green"
style="background-color: green"
></div>
<div
class="option"
data-color="orange"
style="background-color: orange"
></div>
<div
class="option"
data-color="purple"
style="background-color: purple"
></div>
<div
class="option"
data-color="yellow"
style="background-color: yellow"
></div>
<div
class="option"
data-color="black"
style="background-color: black"
></div>
<div
class="option"
data-color="white"
style="background-color: white"
></div>
<div
class="option"
data-color="cyan"
style="background-color: cyan"
></div>
<div
class="option"
data-color="pink"
style="background-color: pink"
></div>
<div
class="option"
data-color="darkblue"
style="background-color: darkblue"
></div>
<div
class="option"
data-color="darkcyan"
style="background-color: darkcyan"
></div>
<div
class="option"
data-color="darkgreen"
style="background-color: darkgreen"
></div>
<div
class="option"
data-color="darkred"
style="background-color: darkred"
></div>
</section>
<button id="mode">체인지</button> //모드를 변형시키기 위한 버튼
<button id="destroy">초기화</button> //화면을 하얗게 만들기 위한 버튼
<button id="eraser">지우개</button> //그림판의 지우개를 만듦
<input type="file" id="file" accept="image/*" /> //요게 이제 외부 이미지 파일 끌어올수 있음
<input id="text" type="text" placeholder="쓰고화면더블클릭하세요" /> //accept를 통해 원하는 종류의 파일구분
<button id="save">저장</button>
<!-- <a href="index.html">인덱스로</a> -->
<script src="/paintJS/paint.js"></script> //마지막에 스크립트 태그
</body>
</html>
<paint.css> 뭐 여긴 별거 없는듯?
body {
background-color: pink;
display: flex;
flex-direction: column;
justify-content: center;
align-items: center; //뭐 태그들 세로 정렬
}
canvas {
width: 800px;
height: 800px;
border: 2px solid black; //캔버스의 높이 너비를 만들어야 됨
}
.options {
display: flex;
gap: 5px;
}
.option {
width: 50px;
height: 50px;
border-radius: 50%;
cursor: pointer;
}
<paint.js> 이제 진짜 자바스크립트
const goHome = () => { //위에 홈버튼을 a태그가 아니라 버튼으로 만들어 보고 싶었음
window.location.href = "index.html"; //인덱스로 넘어가는 기능
};
document.getElementById("home").addEventListener("click", goHome); //이제 해당 id가 홈인 버튼에
//클릭이벤트 부여const save = document.getElementById("save");
const text = document.querySelector("#text"); //여긴 각각의 버튼이나 인풋 태그들을
const file = document.getElementById("file"); //참조하는 구역
const eraser = document.getElementById("eraser");
const destroy = document.querySelector("#destroy");
const mode = document.getElementById("mode");
const options = Array.from(document.getElementsByClassName("option")); //여기가 특이한데
const color = document.querySelector("#color"); //색깔을 담은 div태그 전체를 참조해야 하므로
const width = document.getElementById("width"); //elements 복수형 끌어오기 해야함
const canvas = document.querySelector("canvas"); //Array.from으로 안벽한 어레이로 만듦
const ctx = canvas.getContext("2d");
//참조된 캔버스에서 요 매서드로 컨텍스트를 만들어야함canvas.width = 800;
canvas.height = 800; //여기서도 캔버스에 높이 너비를 줘야했는데 이유가 있겄지
ctx.fillStyle = "white"; //담에 없애고 테스트 해봐야지
ctx.fillRect(0, 0, 800, 800); //기본적으로 전체를 하얀색으로 두고 시작
ctx.fillStyle = "black"; //fillRect은 사각형을 만든다.
ctx.strokeStyle = "blue"; //fill 과 stroke의 초기 스타일 색상 지정
ctx.lineWidth = width.value; //일단 초기width의 벨류를 할당한다.이후에는 작동안함
ctx.lineCap = "round"; //기본적으로 둥그렇게 한다.
let isPainting = false; //요거 두개는 앞으로 나온다.
let isFilling = false;
//초기세팅이 끝나고 밑에는 유저와 상호작용하기위함 함수로직들function onMove(event) { //마우스무브 이벤트에 따라 작동하는 함수
if (isPainting) {
ctx.lineTo(event.offsetX, event.offsetY); //트루이면 위치좌표에 따라 선을 긋는다.
ctx.stroke();
return;
}
ctx.beginPath(); //false이면 새로 컨텍스트 작업을 시작하고
ctx.moveTo(event.offsetX, event.offsetY); //단순 위치좌표 시작점만 옮겨 놓는다.
}
function onMouseDown() { //마우스다운이벤트에 할당된 함수
isPainting = true; //마우스 누른 상태면 이즈페인팅을 트루로 만든다.
}
const onMouseUp = function () {
isPainting = false; //마우스 업시 발동되는 함수 이즈페인팅을 펄스로 만든다.
};
const widthChange = (event) => { //선의 굵기를 바꾸기 위한 함수
ctx.lineWidth = event.target.value; //인풋에 type이 range인 태그의 value가 변할때
}; //이벤트가 발생하고 그 이벤트의 타겟의 벨류로 선굵기를 변경한다.
function colorChange(e) { //색상변경 로직
ctx.strokeStyle = e.target.value; //type이 color인 인풋태그의 이벤트 발생시 해당 벨류로
ctx.fillStyle = e.target.value; //선 색상과 채우기 색상을 바꾼다.
}
function colorClick(e) { //동그라미 div태그안 색상으로 색상변경
const setColor = e.target.dataset.color; //html파일에서 data-color라고 만들어준 임의의 속성을
// console.log(setColor); //dataset으로 가져올수 있다 개 신박
ctx.strokeStyle = setColor;
ctx.fillStyle = setColor; //역시나 그걸로 색상 변경
}
function modeChange() { //이제 채우기모드로 할지 선그리기 모드로 할지 바꿔주는 로직
if (isFilling) { //현재 트루이면 false로 바꿔주고
isFilling = false;
mode.innerText = "배경채우기";
} else { //현재 false이면 true로 바꿔준다.
isFilling = true;
mode.innerText = "선그리기";
}
}
function canvasClick() { //여기서는 상세하게 얼만큰 채워줄지 안정했다.
if (isFilling) { //isfilling이 트루이면 전체 화면을 지정한 색으로 도색한다.
ctx.fillRect(0, 0, 800, 800);
}
}
function resetHandler() { //여기는 바로 위 함수와 거의 흡사하다.
ctx.save();
ctx.fillStyle = "white"; //채우기 스타일이 단지 화이트일뿐
ctx.fillRect(0, 0, 800, 800);
ctx.restore(); //save와 restore 매서드는 현재 조건을 저장하고 다시 되돌린다.
} //fillStyle이 white인 상태는 저장되지 않도록 한 로직
function eraserHandler() { //지우개 기능 함수
isFilling = false; //일단 stroke와 같기 때문에 isfilling을 false로 돌리고
ctx.strokeStyle = "white";
mode.innerText = "배경채우기"; //stroke스타일을 하얀색으로 해준다.
}
function fileChange(event) { //캔버스의 외부 사진을 넣어보기위한 함수
const filefile = event.target.files[0]; //type이 file인 인풋태그에 발생하는 이벤트에는
const url = URL.createObjectURL(filefile); //파일스라는 속성에 정보가 담긴다.
// console.log(url); //해당정보를 통해 url주소를 만들고 요 매서드를 통해서
const image = new Image(); //image태그를 하나 만드는 작업
image.src = url; //속성을 만들어놓은 url을 할당
image.onload = function () { //작업 완료후 이루어질 함수
ctx.drawImage(image, 0, 0, 800, 800); //이미지를 화면 전체에 그린다.
file.value = null; //태그 자체에 value는 초기화 한다.
};
}
const textInput = (e) => { //화면에 글자 남기기
// console.log(text.value);
// console.dir(e);
ctx.font = "60px serif"; //폰트 설정
ctx.fillText(text.value, +e.offsetX, +e.offsetY); //위에 참조해둔 text의 밸류를 채우고
}; //캔버스에 이벤트 발생시 위치 좌표에 글자를 뿌린다.
function saveBtn() { //저장버튼 그림판 이미지를 다운받는다.
const url = canvas.toDataURL(); //캔버스의 이미지를 url로 만든다. base64어쩌구로 만든다나 뭐라나
const a = document.createElement("a"); //앵커태그 하나 만들고
a.href = url; //href속성에 할당해주고
a.download = "drawing.png"; //download속성을 만들어주는데 속성값을 요거
a.click(); //그리고 자동으로 그 태그 클릭발동 가상태그라 브라우저에는 안뜸
}
canvas.addEventListener("click", canvasClick); //요기들은 이제 위에서 만든 함수들을 어떤 이벤트에
//또한 어떤 태그에 할당할지 정한다.canvas.addEventListener("mousemove", onMove);
canvas.addEventListener("mousedown", onMouseDown); //canvas면 캔버스에 해당 이벤트가 생기고
canvas.addEventListener("mouseup", onMouseUp); //맨위에 참조한 태그들에 addEventListener로
canvas.addEventListener("mouseleave", onMouseUp); //함수를 할당해준다.
width.addEventListener("change", widthChange); //클릭이나 체인지는 흔한데 나머지는 신박함
color.addEventListener("change", colorChange);
options.forEach((color) => { //옵션스라는 태그는 여러개의 배열이다.
color.addEventListener("click", colorClick); //배열마서드로 각각에 동일한 함수이벤트를 할당한다.
});
mode.addEventListener("click", modeChange);
destroy.addEventListener("click", resetHandler);
eraser.addEventListener("click", eraserHandler);
file.addEventListener("change", fileChange);
canvas.addEventListener("dblclick", textInput);
save.addEventListener("click", saveBtn);
여러종류의 이벤트를 만들어볼수 있어서 재밌었고 바닐라 자바스크립트가 충분히 야무지다는 생각이 든다.
리액트 넥스트와는 다른 재미가 있구먼